Let’s get started!
What You’ll Be Creating:
Here’s a look at the outcome you’ll be able to produce by the end of this lesson: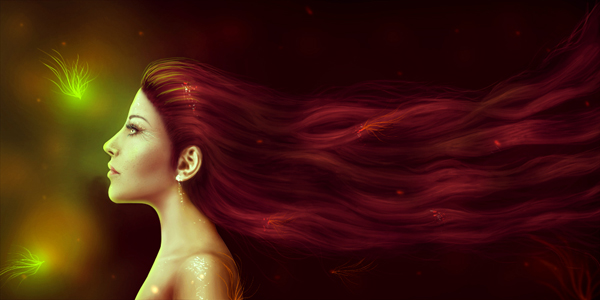
Resources Used In This Tutorial
Step 1
Create a new document in Photoshop with the settings below:
The background color should be black.
Step 2
Press Cmd/Ctrl+Shift+N to make a new layer. Active the Brush Tool (B) and paint with the color #2d0f02 on the black canvas: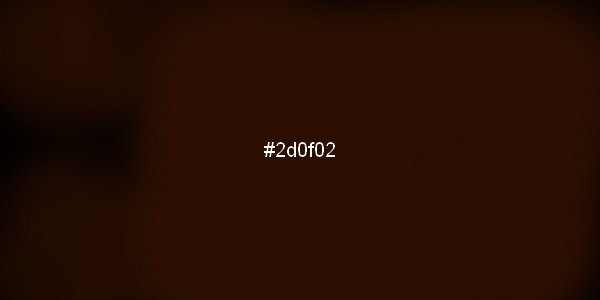
Step 3
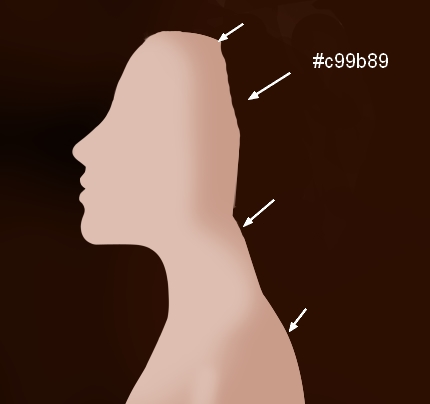
Make a new layer and use a hard brush with the color #ddbeb1 to paint a shape of a woman so you can know where to paint the details.. You can look at your reference to know how to form it but there is a very important rule : don’t trace your reference and copy every detail of it. Reference is for you to learn about anatomy, perspective, lighting, shadow, etc,..and from it you can paint your own. It might be very hard and needs practice, especially if you’re a beginner but trust me, it’s worth.
Create a new layer and use a soft brush with the color #c99b89 to paint behind the head, shoulder and neck for a basic shading:
Step 4
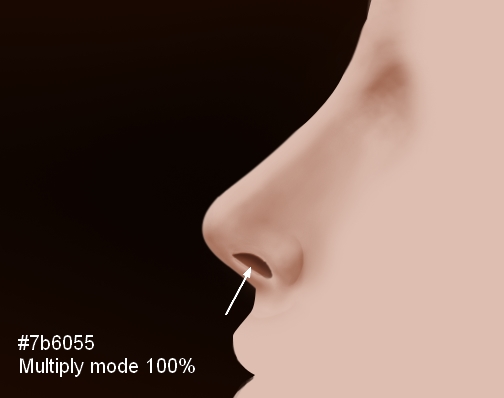
Make a new layer and use a soft brush with the color #7b6055 to paint on the nose part.
Click the second button at the bottom of the Layers Panel to add a mask to this layer. Use a black brush to form a nose for the face, remember to increase the brush hardness with the nostril and lower the hardness for other details. Also determine the light source so you can paint the light/shade properly later. In this case I am to make the light from the front of the model.

I made a new layer, changed the mode to Multiply 100% and used the same brush to darken inside the nostril:
Step 5
Create a new layer and use a hard brush with the color #ddbeb1 (same with the skin) to paint a shape of the ear.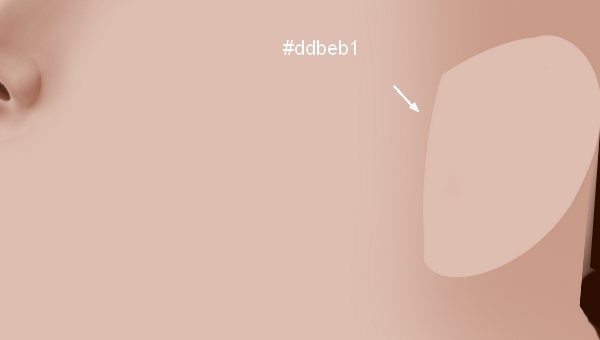
Add a mask to this layer and use a soft black brush to blend the ear with the head:

I made a new layer, changed the mode to Overlay 100% and filled with 50% gray:

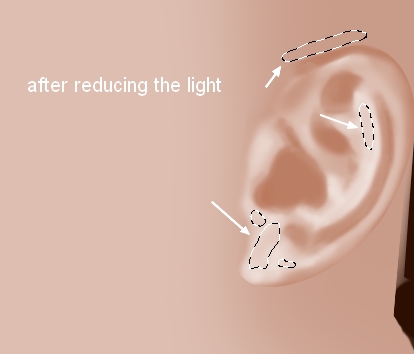
Active the Dodge and Burn Tool (O) with Midtones Range, Exposure about 20-30% to create the details of the ear. Look at the references to see how the ear formed. You can see the result of mine with Normal mode and Overlay mode:

I used a layer mask to reduce the highlight on some parts below:
Step 6
Make a new layer with Clipping Mask and use a soft brush with the color #7b6055 to strengthen the shade inside the ear and make it more realistic:
Step 7
Make a new layer under the ear layer, use a soft brush with the color #7a432c to make a shadow for the ear. Don’t worry if it does not look neat, it will be mostly covered by the hair later:
Step 8
Make a new layer and use a hard brush with the color #e8b5bb to paint a lips base:
Create a new layer under the lips one and use a soft brush with the color #7a432c, the opacity and flow about 20-30% to paint the shade under the lips and on the chin:

I used a new layer with the same settings like in the step 5 and used the Dodge and Burn Tool to create light/shade on the lips, Notice that the light come from infront so the front of the lips must be brighter and the edges darker:

Step 9
Make a new layer above the lips one, use a hard brush with the color #fbf3f4, the size about 10-15 px (it depends on the size of your document) to paint the lips texture:
I used a new layer, took a hard brush with the color #452c2e to paint the thin shade between two lips:

Step 10
I made two new layer and used the Dodge and Burn Tool to create more details, add lighting/shade to the face and body. Now the reference is necessary to know where to paint properly.

Step 11
It’s time for the eye. Make a new layer on the top and use a soft brush with the color #8e5b46 to paint on the eye part. Use a layer mask to form an eye base:
I used another with the same brush to paint some wrinkles under the eye, remember to lower the brush size :
Step 12
Make a new layer under the eye one and use a hard brush with the color #d8d6d6 to paint the sclera. Don’t use white color for it as it would look flat and unatural: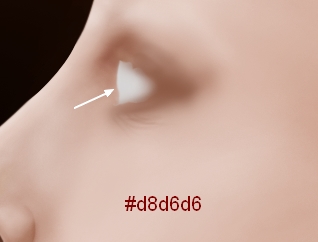
I used the Dodge Tool to brighten the edge of the sclera more:

Step 13
Make a new layer and use a hard brush with the color #231917 to paint a shape of the iris (feel free to choose the color you like but it should be a dark one):
I used a new layer and a soft brush with the color #ced0d0 to paint the details inside the iris and make the pupil visible:

Make another layer, use a hard brush with the color #f1f7fb to paint a reflection for the eye. The reflection can be anything so you’re free to paint as you see fit:

Step 14
On a new layer, use a hard brush with the color #231917 to paint the eye contour and the eyelid:
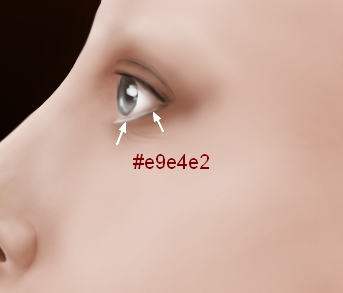
I used a new layer and a brush with the color #e9e4e2 to paint a line inside the lower eye contour:
Step 15
Create a new layer and use a hard brush with the color #231917 to paint the eyelashes, remember to make the lower eyelash thinner: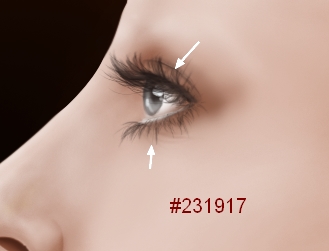
Step 16
On a new layer use a brush with the hardness about 40%, the color #6c4e49 to paint the eyebrow shape. Don’t make it solid to avoid a rigid look:
Create a new layer and use a hard brush with the color #5e483f to paint the eyebrow hairs following the shape:

Step 17
Make a new layer under the eye group ( you should group your layers). Use a brush with the color #7a432c to paint more shade under the chin and the face contour:
I used a new layer and a soft brush with the color #c99883 to paint more shade on the head and body. Change this layer mode to Multiply 100%:
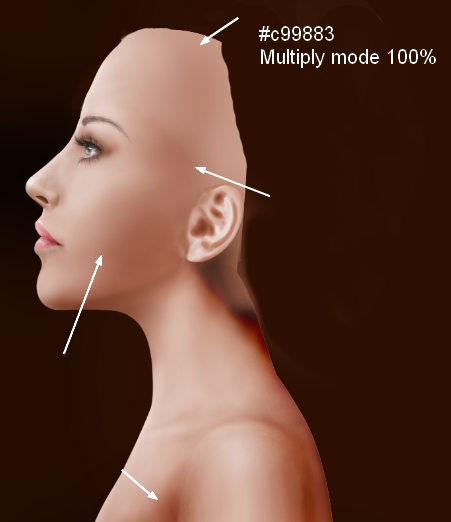
Create another layer and use a soft brush with the color #e9e4e2 to make more light on the face and body, especially around the eye, on the chin, cheek and shoulder:

Step 18
To make the skin more realistic, I created a new layer on the top and used a hard black brush with the settings below:

Paint some freckles on the nose, cheek, chin, forehead then use a layer mask to reduce their opacity:

Change this layer mode to Soft Light 100%:

Step 19
I use two adjustment layers to change the model color. Go to Layer > New Adjustment Layer > Hue/Saturation:
I used Photo Filter to add some cool tone to the model:

Step 20
It’s time for my favorite stage: painting the hair. Make a new layer on the top and use a brush with the color #3a1f27, the hardness about 60-65% to paint the hair base. I want to paint a long flying one but you can paint in the style you like.Step 21
Make a new layer and use a brush with the color #5e334c to paint the basic strands for the hair:
Step 22
On a new layer use a lighter brush (#784262) to paint more smaller strands for the hair:
Step 23
I used a new layer and a brush with the color #9d5981 to paint smaller, flying hair strands and make the hair more detailed: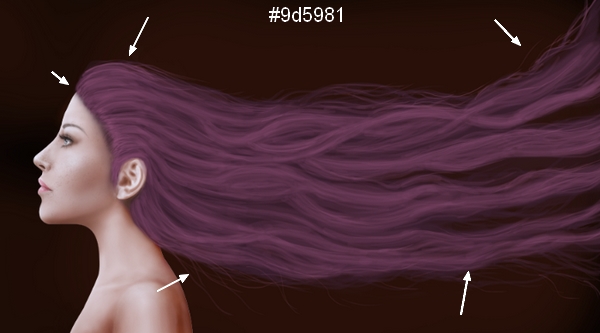
Step 24
Make a group for all the hair layers and change the mode of this group to Normal 100%. Make a Hue/Saturation adjustment layer to change the hair color:

Step 25
To make a depth for the hair I made a new layer and used the Dodge and Burn Tool for the light and shade, try to create a smooth look:
Step 26
In this step I used a hard brush with the color #fff0bd to make the light inside the eye stronger. Alter this layer mode to Hard Light 100%:
Step 27
On a new layer, use a soft brush with the color #d1ff74 to paint a green light effect on the left of the model and on the contour of the face and body:
Step 28
Make a new layer, use a hard brush with the color #481b07 to paint some curly lines at the eye edge:
I used another color for the brush (#74f4ff) to paint some lighter lines around the eyes, eyelashes, eyebrow:

Step 29
Create a new layer, use a hard brush with the color #e47361 to spot randomly around the eye:
Step 30
Make a new layer on the top. Use a hard brush with the color #e47361 to paint randomly around the model, remember to vary its size. Change the mode of this layer to Color Dodge 100%:
Add a mask to this layer and reduce the dots opacity:

Double click this layer, choose Outer Glow:
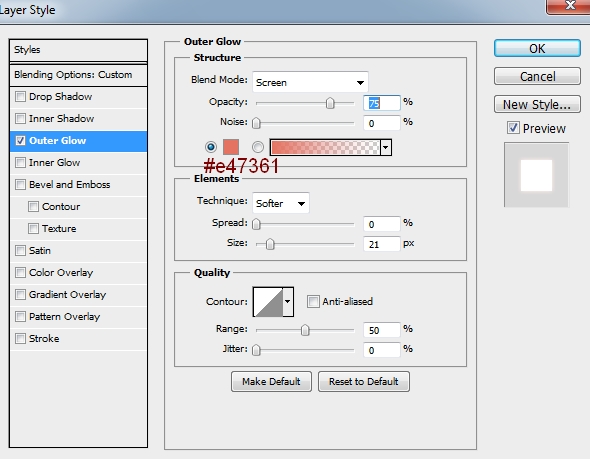

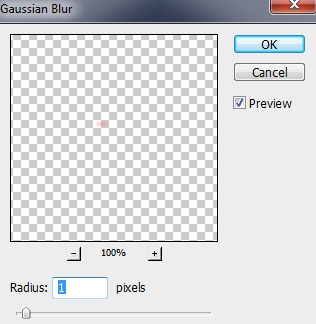
Go to Filter > Blur > Gaussian Blur and set the radius to 1 px:

Make a group for this layer and change its layer mode to Color Dodge 100%.
Step 31
Create another layer (within this group) and use the same brush to spot on the hair and model body: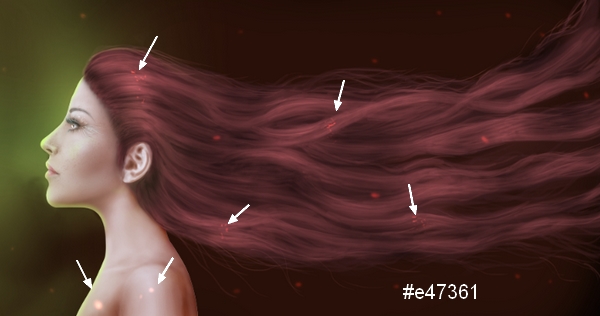
On a new layer, use a hard brush with the color #74f4ff to paint some little sparks on the model:

Step 32
Make a new layer (within this group) and use a hard brush with the color #ff642a to paint over the picture (except the model), remember to vary its size and opacity:
Apply Gaussian Blur with 15 px:

Step 33
Make a new layer, use a hard brush with the color #bcff00 to paint some curly lines as shown below:
Duplicate it several times, transform and arrange them around the model. I applied Gaussian Blur with 2 px to the one at the bottom right of the pic:

Step 34
I used Hue/Saturation to change the color of some of them:


Step 35
I used a soft brush with the color #bcff00 to paint on the left side of the picture to make some glowing green light there:
Step 36
It’s time for coloring the scene. Make a Color Fill layer on the top and change its layer mode to Exclusion 100%:

Step 37
I used Color Balance to continue coloring:

Step 38
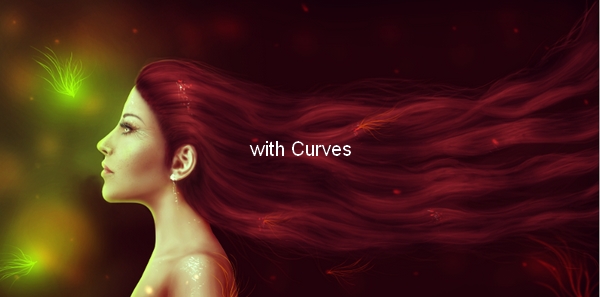
I used Curves to increase the picture contrast:
Step 39
I used Selective Color and adjust the Reds and Yellows settings:
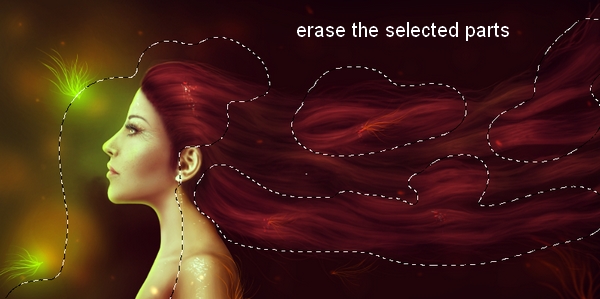
On this layer mask use a soft black brush to erase the parts I don’t want to be affected by this adjustment layer:
Step 40
I used Levels to increase the contrast a little:

Step 41
In this step I used a hard brush with the color #bcff00 to paint some green hair strands on the top of the head (reflected from the green light on the background):
Congratulations, You’re All Done!
Awesome job making it this far! You should be proud of what you’ve created. Show it off to your friends and colleagues and get some feedback.You can also comment here with your version, or any questions you had about the techniques used. We love to see what you guys create and we’re always here to give helpful feedback and tips to help you to improve.


Out Of Topic Show Konversi KodeHide Konversi Kode Show EmoticonHide Emoticon